Those
working without a zoom lens have only one option to make the subject bigger in
the frame: move closer. This is sometimes jokingly referred to as “human zoom”.
This may be funny, the effect of the camera "human zoom" is very different from the effect of a zoom lens.
This can
work for you, if you handle it well, or it can work against you if you handle
it badly.
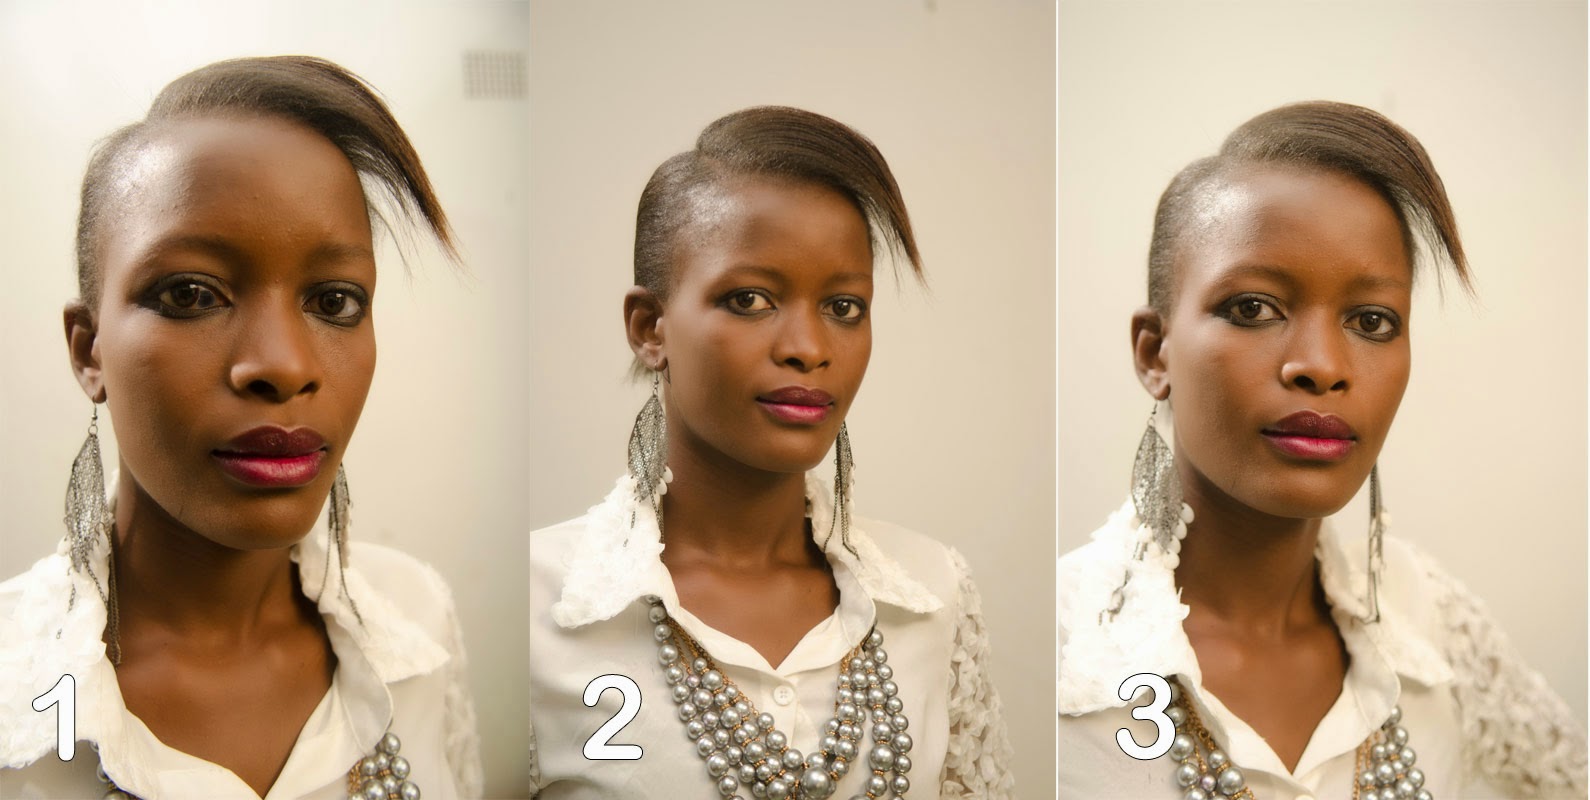
In photo 1
I deliberately distorted the face of model Peggy Mwanguku to the point that
even she does not look particularly beautiful. I was about 20cm from her face.
You’d rarely do this, even if you wanted to, because your subject is usually
uncomfortable with a camera so close to the face. (Peggy is a good model so she
can handle any camera position) It shows that the parts of the face close to
the camera are exaggeratedly big. While the parts further from the camera (like the ears) are
very small. In this case the nose and lips were close, they come out too big.
This type of distortion does not have much practical use beyond humour. It is called wide angle distortion, after the
wide angle lens used here.
But here’s
the catch: it is not the lens that causes the distortion, it is the distance
between the lens and the subject.
Photo 2
shows the beauty of Peggy photographed in a regular way (about 2.5 meters away).
See how the features here are realistic, and flattering. In photo 3 I made the
same mistake as in photo 1 but not so badly, so we see a little distortion.
Occasionally you see photos like this published. This should be avoided. Peggy looks much more beautiful in photo 2.

For a
head-shot I recommend to keep to keep the camera at a distance of at least 2
meters (6 feet) from the subject. Then use the zoom to get close enough to get
the composition you want. If you have no zoom, still keep the distance of 2
meters, and later in photoshop you can crop the part you need. (see photo 4). You
see that a wide angle lens can give you the correct perspective, if you keep
the right distance. For this you need to make sure your photo has high
resolution and is very sharp: when you enlarge part of the photo, both the
pixels are enlarged as well as any unsharpness. (for an explanation of pixels
see my previous blog entry). If you do not have a high quality camera
available, and no zoom lens of the required range, then you have no alternative
but to change the concept of the photo, let go of the headshot and make a half-shot
(upper body). (Be flexible in your approach, and remember that, no matter how
much top class equipment one has, there are always technical limits. And some
amazing photos have been made with very simple equipment).
In the
previous example the wide angle distortion (not caused by the wide angle lens
but by the proximity of the camera to the subject!) worked against the photo.
But when used well it is a great tool. If you want to emphasize something small
in the photo, placing it very close to the lens makes it bigger, and then you
can include something much bigger further from the lens.
In photo 5 I asked
Peggy to make a selfie. I want to make the telephone big, so the action is emphasised.
So I went in close to the telephone. To also include Peggy I needed to zoom
out. You see a photo with dynamic lines caused by wide angle distortion and a
big telephone in one corner; in the other corner is Peggy’s face, which is needed
for the story: the subject of the selfie. If I would have zoomed in, I would have
gotten only the hand with the telephone. This could be a good photo, but it
does not talk about a selfie. So I did need the wide angle for this photo.
If I
take distance from my subject and zoom in a I do get photo 6 of Peggy making a
selfie. It works OK, but it lacks the dynamic emphasis of photo 5, where I used the wide
angle distortion to my advantage. Notice that, because of the wide angle setting
photo 5 has much more of the background in the frame than photo 6.


